Are you tired of constantly replacing your outdoor 12v solar battery charger due to water damage? This blog post will discuss how to waterproof your DIY outdoor 12v solar battery charger to ensure its longevity and effectiveness. Following these simple steps, you can enjoy a reliable and durable Outdoor 12v Solar Battery Charger for all outdoor needs.
Understanding Solar Power Basics
Embarking on the journey of building a DIY waterproof outdoor 12V solar battery charger requires a fundamental grasp of solar energy principles. Solar panels, the cornerstone of this project, capture sunlight and convert it into electrical energy. This conversion process hinges on the photovoltaic effect, where light photons hitting the solar panel’s surface trigger the release of electrons within the panel’s material, generating an electrical current.
The electricity produced is in direct current (DC) form, which can then be stored in a battery for future use. This stored energy becomes a versatile power source for various outdoor applications, from lighting to powering devices, offering a green and renewable alternative to traditional power sources. The efficiency of this process is paramount, influenced by factors such as the quality of the solar panel, the intensity of sunlight, and the angle of installation, which impacts how much energy can be harnessed throughout the day.
It’s also crucial to understand the role of the charge controller in this setup. This device ensures that the energy flowing into the battery does not exceed its capacity, preventing overcharging that could lead to battery damage. The symbiosis between the solar panel, charge controller, and battery forms the backbone of your outdoor 12V solar battery charger, underscoring the importance of selecting compatible components that align with your energy requirements and environmental conditions.
Gathering Your Materials
High-Quality Waterproof Enclosure
Source a durable and high-quality waterproof enclosure to encapsulate and safeguard the internal components of your charger from moisture and direct water contact.
Waterproof Sealant
Include waterproof sealant to seal gaps or joints where two surfaces meet, preventing water ingress and protecting vulnerable areas of your charger from moisture damage.
Waterproof Cable Connectors
Acquire waterproof cable connectors to maintain secure and dry connections between the solar panel, charge controller, and battery, ensuring the integrity of your system’s electrical connections.
Waterproof Charge Controller
Ensure your charge controller is waterproof to effectively manage the flow of electricity from the solar panel to the battery, crucial for maintaining the overall resilience of your charger against weather conditions.
Prioritize Quality and Compatibility
Prioritize quality and compatibility with your system when selecting materials to ensure a seamless and efficient waterproofing process, enhancing the durability and effectiveness of your outdoor 12V solar battery charger.
 Choosing the Right Outdoor Solar Battery Charger
When embarking on your DIY project to create an Outdoor Solar Battery Charger, selecting an appropriate solar panel is a critical decision that will significantly impact the efficiency and durability of your system. The market offers a variety of solar panels, but not all are suited for outdoor and waterproof applications. Therefore, focusing on panels designed explicitly for resilience in outdoor environments is critical.
A crucial aspect to consider is the panel’s efficiency rating. This rating indicates how effectively the panel converts sunlight into electrical energy. A higher efficiency rating means more power generation, which is especially beneficial in areas with limited sun exposure. This efficiency will ensure your battery charger remains productive even on days with less than optimal sunlight.
Durability is another vital factor. Opt for solar panels encased in sturdy, weather-resistant materials capable of withstanding harsh environmental conditions such as heavy rain, strong winds, and extreme temperatures. This durability is essential for outdoor applications where the panel will be exposed to the elements year-round.
The panel’s physical size and power output must also align with your system’s needs. Consider the space available for mounting the panel and the energy requirements of your battery and connected devices. A balance between the panel’s size and output ensures that your system is sufficiently bulky and underpowered for energy needs.
Lastly, compatibility with your overall system, including the charge controller and battery, must be considered. Ensuring that all components can work efficiently together will save you from potential headaches and system malfunctions down the line. By meticulously selecting a solar panel that meets these criteria, you’ll set the foundation for a robust and efficient outdoor solar charging system.
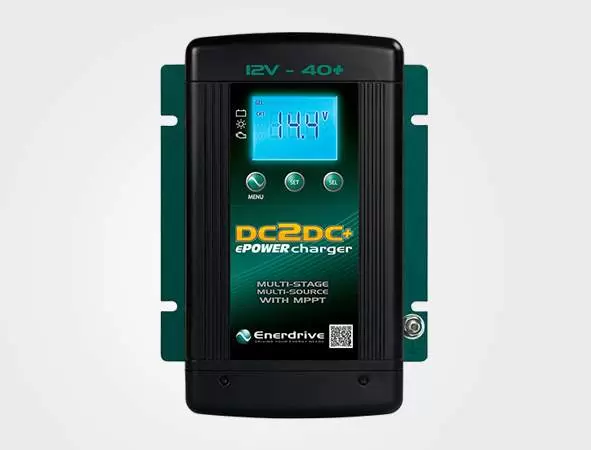
The Heart of Your Charger: The Waterproof Solar Battery Charger 12v
The charge controller plays a pivotal role in ensuring the efficacy and safety of your Waterproof Solar Battery Charger 12v.This component acts as a regulator, meticulously managing the electricity flow from the solar panel to the battery. Its primary function is to prevent the battery from overcharging—a condition that could significantly diminish its lifespan and efficiency. A quality charge controller also safeguards against undercharging, which is equally detrimental, ensuring the battery maintains an optimal charge level for prolonged periods.
For your DIY project, selecting a waterproof charge controller is imperative. The outdoor environment introduces various elements such as rain, dew, or even accidental splashes of water, which can be detrimental to electrical components. A waterproof charge controller, therefore, is not merely an option but a necessity to combat these challenges, preserving the integrity of your charging system.
Furthermore, choosingit’s a controller with a voltage rating compatible with your battery is essential. This compatibility is crucial for maintaining battery health and optimizing the charging process. The proper charge controller will adeptly match the solar panel’s output with the battery’s storage capacity, ensuring a balanced and efficient energy transfer.
Incorporating a charge controller that meets these specifications into your solar charging setup not only enhances performance but also contributes significantly to the system’s durability and reliability, guarding against the common pitfalls of solar charging in outdoor settings.
Battery Basics: Storing Your Solar Power
The cornerstone of a practical outdoor 12V solar battery charger is the battery itself, which stores the energy your solar panels harvest for later use. The optimal choice for this application is a deep cycle battery, distinctively engineered for the rigors of solar storage. These batteries can endure repeated, deep discharging and recharging cycles, making them ideal for solar applications where the energy flow fluctuates with the sun’s availability.
Consider the battery’s capacity for your project, which should align with your energy needs. A larger capacity allows for more stored energy, providing power over extended periods when sunlight is unavailable. However, balancingit’s capacity with your system’s output and your power requirements is essential to avoid overinvestment in unnecessarily large storage solutions.
Equally important is ensuring your battery’s chemistry is suitable for outdoor use. Lithium Iron Phosphate (LiFePO4) offers durability, a longer lifespan, and improved safety characteristics compared to traditional lead-acid batteries. Regardless of the type, maintaining your battery involves regular checks for clean terminals, secure connections, and optimal charge levels to prevent degradation of its storage capacity over time.
Integrating a battery with these considerations solidifies the backbone of your solar charging setup, ready to serve your outdoor power needs reliably.
Waterproofing Your Solar Charger
Waterproof Sealant Application
Apply a high-quality waterproof sealant on all junctions and entry points where wires penetrate the enclosure to prevent moisture infiltration and maintain the system’s integrity.
Waterproof Cable Connectors
Integrate waterproof cable connectors to provide a robust barrier against water for all electrical connections, ensuring protection against water damage for the solar panel, charge controller, and battery connections.
Durable Enclosure
House the entire setup within a durable, waterproof enclosure to act as a shield against the elements, repelling water and protecting the system’s components.
Proper Enclosure Selection
Select an enclosure that comfortably fits all components and provides easy access for maintenance while maintaining a watertight seal to ensure long-term protection against water intrusion.
Meticulous Implementation
Implement waterproofing measures meticulously to enhance the resilience of your solar charging system, ensuring it remains operational and efficient in various weather conditions.
Mounting and Positioning Your Waterproof Solar Battery Charger
Properly mounting and positioning your Waterproof Solar Battery Charger is paramount to harnessing the maximum amount of solar energy. Identifying a spot that benefits from unobstructed sunlight for most of the day is essential. This could mean installing the panel on a rooftop, an open yard, or any elevated area free from shade. If you are in the Northern Hemisphere, the orientation of the solar panel should face south to ensure it captures sunlight effectively throughout the day.
Adjusting your solar panel’s angle according to the changing seasons will also optimize its efficiency. During summer, a lower angle is preferred as the sun is higher in the sky, whereas, in winter, a steeper angle helps capture sunlight more directly since the sun is lower on the horizon. Adjustable mounting brackets can simplify this process, allowing you to quickly change the panel’s tilt as needed.
Keep in mind the distance between your solar panel and the battery. Minimizing thito change the panel’s tilt as needed quicklynsmission. However, if a longer cable run is unavoidable, use cables of adequate thickness to mitigate voltage drop. Careful planning in the mounting and positioning your solar charger can significantly impact its performance and your overall satisfaction with the project.
Conclusion
Embarking on the journey to build your own waterproof Outdoor 12v Solar Battery Charger equips you with a sustainable energy source. It imbues a sense of accomplishment in creating something both eco-friendly and practical. The steps outlined here guide you to ensure that your solar charging system can withstand the elements, making it a dependable companion for outdoor adventures. Prioritizing waterproofing techniques and choosing materials for the task are essential steps. Engaging with this project, from understanding the basics of solar power to the intricacies of assembling your charger, offers an educational experience beyond physical construction.
FAQs
Q: What type of battery is best for my DIY Outdoor 12v Solar Battery Charger?
A: A deep-cycle battery is highly recommended for optimal performance and longevity. These batteries are designed to endure the frequent and deep charge-discharge cycles associated with solar power, making them ideal for this application.
Q: How frequently should maintenance be conducted on my solar battery charger?
A: Regular maintenance is crucial for ensuring the longevity and efficiency of your solar charger. It is advisable to perform a thorough inspection and maintenance routine once a month. This includes cleaning the solar panel to remove any debris or dirt that may obstruct sunlight and checking the connections to the battery to ensure they are secure and free from corrosion.
Q: Can the DIY solar charger withstand all types of weather?
A: While the waterproofing steps outlined in this guide significantly enhance the durability of your solar charger against rain and snow, exceptionally severe weather conditions, such as hurricanes or heavy storms, could still pose a threat. Therefore, it’s essential to stay informed about upcoming severe weather and take necessary precautions to protect your charger, such as temporarily disassembling it or covering it to shield it from potential damage.
| Other Good Articles to Read |
| Blogs-Nation |
| Blogs-Peoples |
| Bryan Smith Blogs |
| Intellect Blogs |
| The Fault In Our Blogs |
| Blogs Eu |
| Oz Forums |
| Recruitment Blogs |
| Zet Blogs |
| Id Blogs |
| Blogs Tudiolegale |
| Related Business Listings |
| Contact Directory |
| Local Business Profiles |